
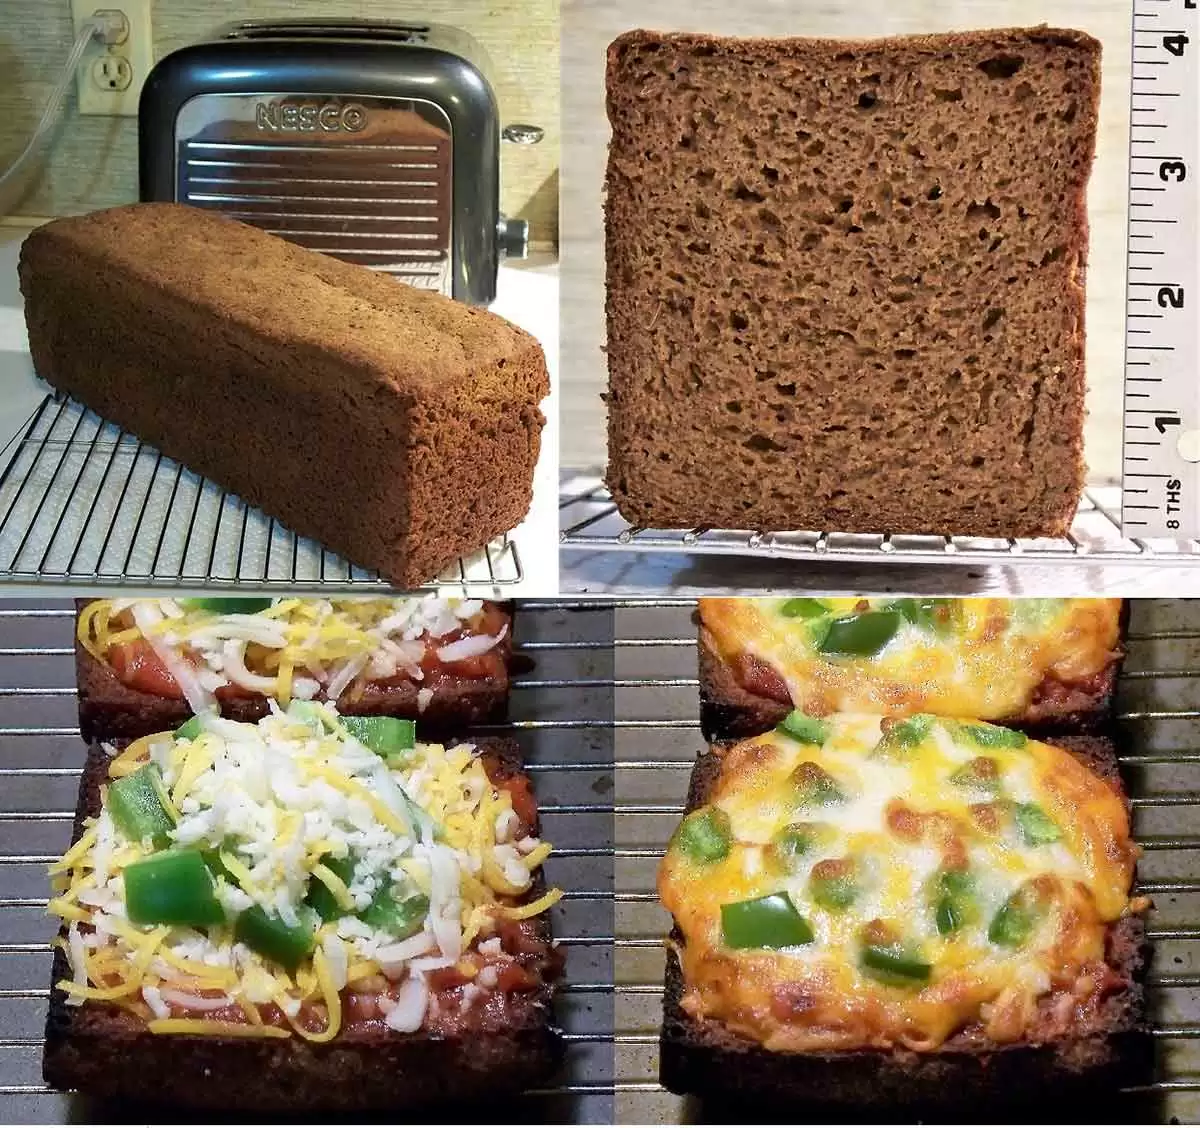
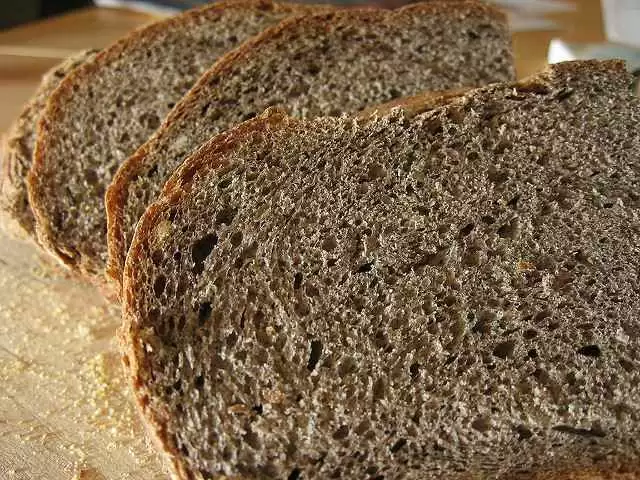
Celiac.com 06/29/2018 - No rice flour here. This totally satisfying, wholesome, nutritious, hearty gluten free bread exudes the robust taste and firm, springy texture of rye bread. It really, really tastes like REAL bread, no exaggeration. The bread is absolutely delicious toasted or untoasted, keeps fresh for over 2 weeks in the refrigerator, and does not tear, sink in the center, dry out or crumble. This incredible 4 inch tall loaf can even be sliced nearly paper thin and still hold together. It is vegan, free of soy, corn, wheat, gluten, nuts, dairy, or eggs. Add caraway seeds and you'll want to break out the mustard, pickles, and coleslaw. It makes the perfect deli bread. Want pizza? Toasted slices of this bread make great pizza crusts for quick and easy gluten free mini pizzas. Even those not on a gluten free diet will find this bread utterly irresistible.
A Quest Begins
This outstanding GF bread is the result of a years long quest for the perfect GF bread recipe. It began with the classic GF bread recipe of rice flour, tapioca starch, corn or potato starch, powdered dry milk, eggs, oil, sugar, salt, xanthan gum, yeast and water. It later evolved to include bean flours. These early GF bread recipes, mostly starch and "empty" calories, simply tasted horrible and left a bitter aftertaste.
Celiac.com Sponsor (A12):
Rice flour, bean flours and corn starch were quickly eliminated. After scientific studies concluded oats were gluten free and safe (except for possible wheat contamination), oat flour became a central ingredient. Starches were limited to no more than one third of the flour mix. Mashed banana, apple sauce, pumpkin puree, and yogurt were added to increase bread height and volume. Oat flour was blended with flour from other seeds and grains, including sorghum, millet, amaranth, quinoa, and buckwheat. A blend of oat and sorghum flour, tapioca and potato starch, mashed banana and low fat vanilla yogurt became standard GF bread recipe ingredients.
Einkorn
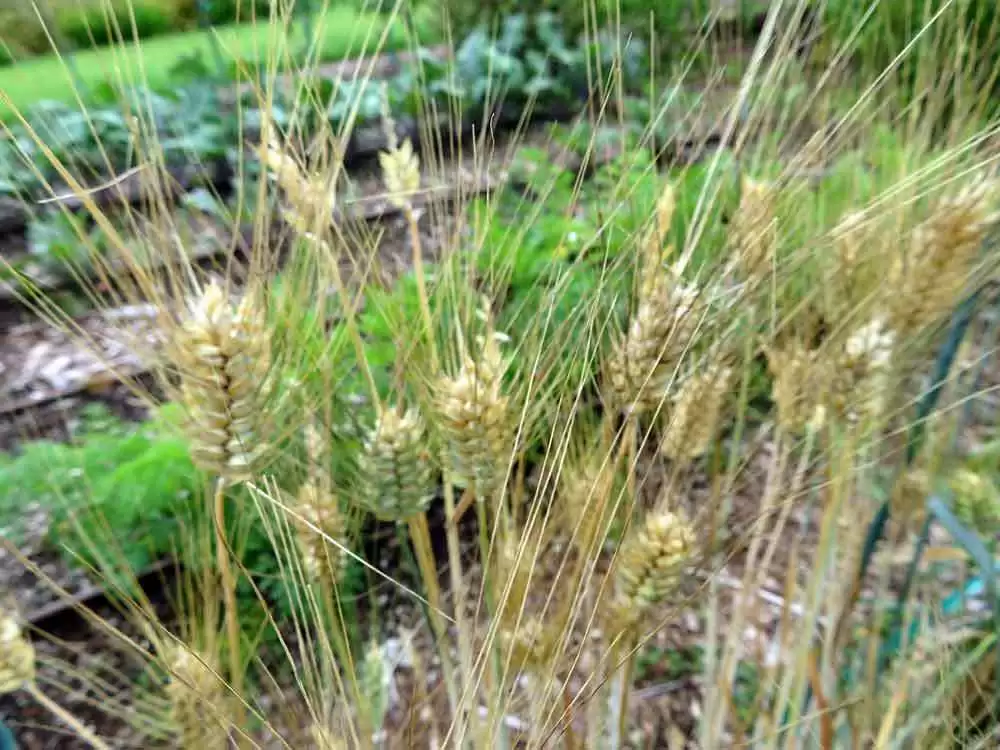
Einkorn an ancient form of wheat, was separately investigated. At that time, einkorn was considered potentially safe for celiacs. Samples of einkorn were obtained from Prime Grains [1] in Saskatchewan, Canada. Einkorn flour was found to have most of same height, volume, and sinking in the center problems as with any other gluten free flour blend in creating a GF bread. Einkorn bread, however, does not require the addition of starches. An oat/einkorn bread recipe similar to an oat/sorghum recipe minus the starches was created, but it became necessary to end the einkorn investigation when new research on einkorn came out showing that einkorn does contain gluten epitopes potentially harmful to celiacs. However, gluten content in einkorn is very low. The investigation produced no ill effects from consuming einkorn. Those with gluten sensitivity rather than celiac disease may well tolerate einkorn with no problems.
Flaxseed
Along with the Prime Grains einkorn samples sent from Saskatchewan, samples of golden and brown flaxseed were also sent. Using a coffee grinder to grind the flaxseed, the ground flaxseed was steeped in near-boiling water and used as egg replacer in GF bread recipes. The steeping releases mucilage from the outer coating of flaxseed to create a thick, slimy emulsion. Flaxseed mucilage seems to have a synergy with beta glucan in oats, a soluble fiber, forming a hydrocolloid combination that increases bread volume. When the Prime Grains flaxseed ran out, flaxseed was locally purchased. It was immediately noticed locally purchased flaxseed produced a much thinner emulsion than did the Prime Grains flaxseed. The local flaxseed had a much lower mucilage content. GF bread made with the local flaxseed had less volume and height and more sinking in the center than the Prime Grains flaxseed. Were it not for the flaxseed samples sent with the einkorn, the great variation in mucilage content in different varieties of flaxseed grown in different localities would have been missed. Little information is available on the mucilage content of flaxseed grown in North America. One study was found [2,3,4].
Prime Grains flaxseed is currently distributed through Farmer Direct Co-op [5] in Regina, Saskatchewan. High mucilage Farmer Direct Co-op flaxseed has been available from Whole Foods in the bulk foods section. Amazon's recent Whole Foods purchase may change that as bulk bin labels no longer state "Farmer Direct", only that it originates from Canada. However, the issue of high mucilage versus low mucilage flaxseed may be moot. The reason is buckwheat. Buckwheat, like flaxseed, also releases mucilage. It turns out buckwheat mucilage also increases bread height and volume, and, when used together with flaxseed, high mucilage flaxseed has no more effect on bread height and volume than lower mucilage flaxseed. More on buckwheat later.
Deep Loaf Pans
GF breads containing eggs and mostly starch can achieve high height and volume without collapsing using an ordinary loaf pan. But to achieve a full 4 inch loaf height using flaxseed as egg replacer and a low starch content requires a loaf pan with high sides. The deepest loaf pans available are 4 inch deep pullman loaf pans. Ideally a pan deeper than 4 inches is desired because GF breads tend to rise above the loaf pan and then fall during baking. Additionally, during baking, the loaf shrinks and pulls away from the pan side walls, more at the top than the bottom, resulting in a loaf narrowing toward the top rather than straight sides. Ideally the the sides of the loaf pan should taper so the bottom is narrower than the top. This cancels out the narrowing of the loaf at the top creating a finished loaf with straight sides. A small batch of 4-1/2 inch depth by 4-1/4 inch width by 8-1/2 inch and 13 inch length tapered heavy duty 16 gauge solid aluminum loaf pans were custom made by a USA baking pan manufacturer for this author to sell online. These long-life, heavy duty pans were ideal, but, unfortunately, high cost and price made for underwhelming online sales. The website was shut down years ago. However, a cheaper 13 inch long by 4 inch width by 4 inch depth aluminum-coated, folded thin steel pullman loaf pan should be adequate for the recipe which later follows. The cover is not needed. The following pans are suggested: USA Pan 13x4x4 Large Pullman Loaf Pan & Cover 1160PM-1 [6] or Chicago Metallic 44615 Pullman pan,single 13x4x4 [7].
Xanthan Gum and Konjac Glucomannan
In the early development of oat and einkorn bread recipes, xanthan gum caused some problems. The use of xanthan gum alone often produced strange odd loaf shapes with concave sides. In one case an extra added teaspoon of xanthan gum caused the loaf to balloon well above the 4-1/2 inch deep loaf pan. When done, the sides of the loaf were sucked inwards and a cross section of loaf had the appearance of a giant mushroom. Konjac glucomannan powder [8] was then investigated. Konjac glucomannan is a natural, odorless soluble fiber that is found in the konjac plant and is the most viscous hydrocolloid available. Konjac used by itself produces a very firm loaf and restricts the bread height and volume. Xanthan gum produces a softer, more elastic bread. Konjac used together with xanthan gum have a synergy which allows the firmness of bread to be adjusted depending on their ratio and amounts. Konjac also "tames" xanthan gum so that the loaf has straight sides instead of turning into a mushroom. For a long time, 1-1/2 teaspoons each of konjac powder and xanthan gum, a one to one ratio, was used in the standard GF bread recipe. But this ratio and amount always resulted in at least some sinking in the center of the loaf. Recalling that additional xanthan gum creates a "mushroom" effect which results in a rounded top, the ratio was changed to 3 teaspoons of xanthan gum and 1 teaspoon konjac powder. This worked, resulting in a loaf with a slightly rounded or flat top, no longer sinking in the center. Psyllium husk was never tried as it generally decreases bread volume and height, not the desired effect [9].
Attempts That Did Not Work
For years a standard GF bread recipe consisting of oat flour, sorghum flour, tapioca starch, potato starch, flaxseed, banana, low fat vanilla yogurt, molasses, sugar, canola margarine, cinnamon, ginger, salt, yeast, xanthan gum, konjac powder, apple cider vinegar, and water became standard daily fare. This recipe provided an acceptable GF bread, but was by no means perfect. It tended to crumble, required delicate handling, sank in the center, and had less volume and height than desired. It was not vegan or dairy free, and its taste could stand improvement. Deciding it was time for a change, numerous attempts to fix these short-comings were made. The attempts that failed included using citrus pectin, sugar beet fiber, gum arabic, and aquafaba (liquid from cooked chickpeas). High methoxyl citrus pectin did succeed in increasing height and volume and reducing crumbling, but its strong, bitter taste made it totally unacceptable.
Choosing the Best GF Starches - Arrowroot and Potato Starch: Yes - Tapioca: No
After the previous failures, investigations focused on how choice of starch affects GF bread volume. One especially interesting published research paper looked at GF breads made using a single starch in place of flour [10]. The study compared breads made with wheat, potato, tapioca, corn, and rice starch. Only wheat and potato starch produced any real bread structure. Corn starch had some bread structure. Tapioca and rice starch produced structures too far gone to be fully analyzed in the study. Tapioca starch produced a shapeless blob. Rice starch produced a crust circling a large empty center. The study revealed that potato starch would be the best GF starch for achieving greater volume and preventing sinking in the center. Unfortunately, the study did not look at arrowroot starch which later was found to be superior to tapioca starch.
The standard oat/sorghum GF bread recipe used equal amounts of potato and tapioca starch. Two baking tests with these starches were performed using the standard GF bread recipe. One test used 3 parts potato to 1 part tapioca starch and the other test used 1 part potato to 3 parts tapioca starch. The test favoring potato starch produced a higher volume and height bread with reduced center sinking, as expected. The test favoring tapioca starch resulted in a drop in volume and height with increased center sinking. Potato starch has a bland, supposedly neutral taste. In the test favoring potato starch the "bland" taste dominated the entire taste of the bread covering up the taste of all other ingredients including molasses, spices, and banana, oats and sorghum, a totally unacceptable result. In the test favoring tapioca starch, a slight off taste was noted, but, worse, when toasted, the tapioca caused increased burning of the crust resulting in a bitter crust taste. It was concluded one should not make excessive use of potato starch and that tapioca starch may not be the best choice for a starch. This led to arrowroot starch as the next subject for investigation.
Arrowroot and tapioca starches appear to be very similar. They definitely are not. Two baking tests were performed with arrowroot and potato starch. One test used 3 parts arrowroot to 1 part potato starch and the other test used equal parts of arrowroot and potato starch. In the test favoring arrowroot starch, the bread did not sink in the center or lose as much volume as when tapioca starch was favored. When toasted, the crust did not burn as with tapioca starch or produce any bitterness. Arrowroot starch also had no off taste as with tapioca starch. In the test with equal parts arrowroot and potato starch, there was a slight improvement in volume and less center sinking than with tapioca and potato starch at equal parts. The conclusion was that arrowroot starch is a superior choice over tapioca starch. Arrowroot may cost more than tapioca starch, but arrowroot starch now replaces tapioca starch as the preferred choice for a perfect GF bread recipe. Arrowroot starch can be found online in bulk at reasonable prices.
Buckwheat - The Key to Volume, Height, Amazing Taste and a Bread That Does Not Sink or Crumble
Still seeking the key to increasing bread volume and height, the world wide web was scoured for ideas. Intrigued by the impressive volume and height of GF breads made with buckwheat and rice flours by Strange Grains Gluten Free Bakery [11] in Perth, Australia, the question was asked, "Could buckwheat be the key?" Buckwheat had previously been rejected from consideration in the course of earlier oat bread recipe development due to a strong, unpleasant bitter taste. It turns out however, toasted buckwheat groats (kasha) were unknowingly used in that earlier trial years ago, a very bad and unfortunate choice. The world wide web provides many learning opportunities, one being that buckwheat flour does not have to taste awful.
Buckwheat flour can be ground from three different forms of buckwheat, each having a completely different taste. The three forms are: 1) whole unhulled buckwheat; 2) raw dehulled buckwheat or buckwheat groats; 3) toasted buckwheat groats or kasha. The familiar earthy slightly bitter taste comes from the buckwheat hulls. In fact, some whole buckwheat flour contains added ground hulls for a stronger earthy flavor. The hulls create a greyish colored flour. Buckwheat groats are dehulled buckwheat seeds. Dehulling removes the source of the familiar earthy flavor. Flour from raw buckwheat groats has a creamy white color and a very mild sourdough rye flavor acceptable to just about everybody except for those who really miss having that earthy buckwheat hull flavor. Kasha or toasted buckwheat groats, on the other hand, has an extremely strong taste and odor that is popular in some cultures, but absolutely repulsive to most people. Kasha has a taste slightly suggestive of rye on the plus side but an odor strongly reminiscent of rotting food waste on the minus side. Kasha can easily be made by stirring raw buckwheat groats in a pan on medium heat for about 5 minutes until evenly brown and "fragrant". If the "fragrance" drives you out of your house into a freezing snowstorm, then you probably won't like kasha. Actually, after about a week of storage in a plastic bag in the refrigerator, the odor of rotting waste in bread made with kasha flour dissipates leaving the desirable sourdough rye flavor.
Buckwheat flour can easily be made by grinding groats or whole buckwheat in a coffee grinder. Raw buckwheat groat flour is not readily available, especially gluten free certified flour, so a coffee grinder is needed. Gluten free whole buckwheat and raw buckwheat groats are readily available. Bob's Red Mill whole buckwheat flour is NOT certified gluten free (its groats are) but Anthony's Goods has certified gluten free whole buckwheat flour. Whole Foods has raw buckwheat groats in the bulk section at a very reasonable price. Bulk raw buckwheat groats are available online at reasonable prices.
To test if buckwheat was the key to a perfect GF bread, a blend of one cup each of buckwheat, oat, and sorghum flours together with 2/3 cup each of potato and arrowroot starches went into the bread dough for the baking test. The buckwheat flour made the dough much more workable and elastic. Into to oven it went. The result? Success! Buckwheat indeed proved to be the missing key. The bread volume and height increased, reaching just over 4 inches tall. The use of 3 teaspoons xanthan gum and 1 teaspoon konjac powder contributed to a loaf with a slightly rounded top and absolutely no sinking in the center. The bread did not crumble. The rye-like taste was amazing. Why did buckwheat work? Buckwheat, like flaxseed, contains mucilage, and that slimy fiber likely gives buckwheat flour its high viscosity and unique baking properties [12].
Making GF Bread Dairy Free
The final challenge was making the GF bread recipe vegan and dairy free. Low fat vanilla yogurt had been used to increase bread volume and protein. A substitute was needed. The latest trend in protein supplements is yellow pea isolate [13,14]. Yellow pea's protein amino acid profile compares favorably to that of dairy whey although it is not a totally complete protein. One study determined yellow pea protein added to GF bread had the highest level of sensory perception consumer acceptance compared to other proteins added to GF bread [15]. Yellow pea protein has also been used as the basis for a dairy free milk made by Ripple Foods [16]. Yellow pea protein is available from a number sources including Anthony's Goods, Bob's Red Mill, and Bulk Food Supplements. For the new GF bread vegan recipe, 2/3 cup of low fat vanilla yogurt was replaced with 1/4 cup yellow pea protein isolate powder plus 5 oz water. Yellow pea is a legume. If you have allergies to soy or peanuts (also legumes) use with caution, though yellow pea is considered to be much less likely to be an allergen. The yellow pea protein powder can be omitted with little effect on the overall GF bread recipe. Just replace it with another heaping tablespoon each of buckwheat, oat and, sorghum flours to maintain bread volume.
Another vegan consideration is choice of oil. Canola oil, olive oil, coconut oil or a vegan buttery flavored spread like Smart Choice Original or Earth Balance Soy Free can be used. Smart Choice Original and Earth Balance Soy Free use yellow pea protein in place of dairy whey and sunflower lecithin in place of soy lecithin.
Molasses or Maple Syrup?
Molasses is used in the standard GF bread recipe to achieve a satisfying robust rye flavor. For an alternative subtle, delicate, sweet maple taste, grade A very dark and strong flavor maple syrup can be used in place of the molasses and granulated sugar. Pure maple syrup is a very pricey ingredient. The subtle change in taste using maple syrup may not really be worth the syrup's high cost, but the option is included in the recipe below, nonetheless. Maple syrup is sold in four grades: grade A golden color and delicate taste; grade A amber color and rich flavor; grade A dark color and robust flavor; and grade A very dark and strong flavor. Only use grade A very dark and strong flavor maple syrup for baking. The maple flavor of lighter shades of maple syrup is too weak to be tasted when used in most baked goods. The money spent using lighter shades of pricey maple syrup will only be wasted. Grade A very dark and strong flavor maple syrup is mostly used for cooking and not available in most grocery stores. It is readily available online and direct from maple syrup farms. Shipping from the east coast to the west coast may cost more than the maple syrup itself. Try to find an online deal with free shipping.
RECIPES
Oat-Sorghum-Buckwheat-Banana-Flaxseed GF Bread
This recipe produces a 56 ounce (1.588 kg) gluten free bread loaf yielding 28 slices 7/16 inch (11.11 mm) thick. Preparation time is about 2 hours 15 minutes. Baking time is 1 hour 40 minutes.
Kitchen Essentials:
- Coffee grinder (preferably burr-type)
- Electric mixer (preferably a stand mixer)
- Mixing bowl
- Pullman loaf pan, 13 inch x 4 inch x 4 inch (33.02 cm x 10.16 cm x 10.16 cm)
- Lidded 2 quart/liter (or larger) plastic food container
- Quart/liter glass or plastic measuring cups (2)
- 5 ounce (150 ml) glass measuring cup
- Potato/banana masher, ricer or food processor
- Hard rubber bowl scraper, specifically Rubbermaid FG1901000000 Scraper 9-1/2 inch
- 1 inch pastry brush
- A good set of stainless steel measuring cups and spoons
- 10 inch x 14 inch (25.4 cm x 35.56 cm) plastic food storage bags with twist ties
- Cooling rack
Dry Ingredients:
- 1 cup (240 ml) oat flour
- 1 cup (240 ml) sorghum flour
- 1 cup (240 ml) buckwheat flour milled from raw dehulled buckwheat groats
- 2/3 cup (160 ml) potato starch
- 2/3 cup (160 ml) arrowroot starch
- ~3/4 cup (180 ml) (approx.) milled flaxseed freshly ground from 1/2 cup (120 ml) whole flaxseed
- 1/4 cup (60 ml) yellow pea protein isolate powder (* can be replaced with 1 heaping tablespoon (20 ml) each of oat, sorghum and buckwheat flour)
- 2 tablespoons (30 ml) granulated sugar (* omit granulated sugar if using maple syrup in place of molasses)
- 2 tablespoons (30 ml) caraway seed (* optional for deli rye flavor)
- 1-1/2 (7.5 ml) teaspoons salt
- 1-1/2 (7.5 ml) teaspoons ground cinnamon
- 1-1/2 (7.5 ml) teaspoons ground ginger
- 1 teaspoon (5 ml) baking soda
- 3 teaspoons (15 ml) xanthan gum
- 1 teaspoon (5 ml) konjac glucomannan powder
- 4 teaspoons (20 ml) fast acting yeast
Wet Ingredients:
- 2 cups (480 ml) cold water to mix with milled flaxseed
- Additional water to mix with mashed banana and molasses (or maple syrup) to achieve 2 cups total mixture
- ~1 cup (240 ml) (approx.) mashed ripe banana (2 medium to large bananas)
- 4-1/2 tablespoons (67.5 ml) molasses, unsulphured, mild (or full flavor) to one's taste (* Alternately, omit molasses and use 3/4 cup (180 ml) maple syrup, grade A very dark and strong flavor)
- 2 + 1 tablespoons (30 + 15 ml) canola, olive or melted coconut oil or melted vegan buttery flavored spread
- Additional oil or vegan spread to grease loaf pan
- 1 teaspoon (5 ml) apple cider vinegar (as an antimicrobial, anti-mold agent)
Directions:
1. Grind enough raw dehulled buckwheat groats in a coffee grinder to make 1+ cups (260 ml) buckwheat flour.
2. Grind 1/2 cup (120 ml) whole flaxseed in a coffee grinder.
3. Place 2 cups (480 ml) COLD water in a quart/liter measuring cup and stir in the ground flaxseed with a fork.
4. Heat water and flaxseed mixture in a microwave oven until near boiling. Let steep for 10 to 20 minutes.
5. Combine all dry ingredients EXCEPT flaxseed into a lidded 2 quart/liter (or larger) plastic food container.
6. Thoroughly shake and blend dry ingredients together in the food container holding lid down securely.
7. Mash, rice, or puree 2 medium to large bananas into a separate quart/liter measuring cup.
8. Using 5 ounce (150 ml) glass measuring cup, warm 4-1/2 tablespoons (67.5 ml) molasses in microwave oven to thin and add to mashed bananas, or, in place of molasses, add 3/4 cup (180 ml) maple syrup to mashed bananas
9. Add enough water to the bananas and molasses (or maple syrup) and stir together so that the liquid mixture measures 2 cups (480 ml).
10. Warm up the banana molasses (or maple syrup) mixture in a microwave oven for 2-3 minutes.
11. Melt 2 tablespoons (30 ml) of coconut oil or vegan spread in a microwave oven in a small bowl, if these oils used.
12. Stir banana molasses (or maple syrup) mixture and steeped flaxseed into a mixing bowl.
13. Add 2 tablespoons (30 ml) oil plus 1 teaspoon (5 ml) apple cider vinegar to the mixing bowl.
14. Grease a 13 inch x 4 inch x 4 inch pullman loaf pan. Use a pastry brush for applying liquid oil.
15. Using an electric mixer with a dough hook, blend liquids for 1-2 minutes at a high medium speed.
16. Stop mixer and add dry ingredients to the bowl. Start mixing at low speed for 15 seconds, then increase to a low medium speed and mix for 16 minutes to a smooth, thick, moist (not wet), elastic dough consistency.
17. Preheat oven to 300-325° F (150-160° C).
18. Using a hard rubber bowl scraper, transfer dough from mixing bowl to the greased pullman loaf pan.
19. Plunge the hard rubber bowl scraper up and down in the dough to level and even out the dough.
20. Melt remaining 1 tablespoon (15 ml) coconut oil or vegan spread in the microwave in a small bowl, if oils used.
21. Use a pastry brush to spread 1 tablespoon (15 ml) oil on top of the dough. Smooth and round the top of the dough with the pastry brush.
22. Allow the dough to rise to just above the top of the pullman loaf pan.
23. Place the pullman loaf pan (uncovered) in the preheated oven and bake for 1 hour 40 minutes maintaining an oven temperature slightly above 300° F (150° C) to avoid burning the crust.
24. When done, remove loaf pan from oven and allow the loaf to cool in pan for only about 10 minutes to avoid the crust becoming soggy from trapped pan moisture.
25. Remove loaf from pan, tapping pan bottom corner edges on counter to loosen loaf. Transfer loaf to cooling rack.
26. Allow bread to cool to room temperature before slicing the loaf into 2 halves with a sharp, smooth edged (not serrated) slicing knife.
27. Store each loaf half in 10 inch x 14 inch plastic food storage bags with twist ties and place in the refrigerator.
28. If you can wait, keep it in the refrigerator overnight before consuming. The bread taste and texture actually improve overnight as it firms up in the fridge. When firm, the bread can easily be sliced nearly paper thin without falling apart. The bread will keep fresh in the fridge for well over 2 weeks and seems to improve in taste as it ages.
Quick and Easy Gluten Free Mini Pizzas
Making mini pizzas using bread slices for crusts is nothing new. But finding a GF bread suitable for a pizza crust is somewhat elusive. Just finding a GF bread with tall enough slices is a challenge. The Oat-Sorghum-Buckwheat-Banana-Flaxseed GF Bread presented above works great! Its full size slices, taste, and texture make for a wonderful mini crust upon which to build an easy, tempting GF mini pizza.
The recipe is simple. Key to this recipe is the use of a cooling rack on top of a metal baking sheet. The cooling rack raises the pizza crust above the surface of the baking sheet allowing hot oven air to circulate under the crust. This keeps the crust dry and crispy, preventing the crust from getting soggy due to moisture trapped between the crust and baking sheet.
Directions for one 2-slice pizza serving:
- Prepare or slice any toppings you desire.
- Preheat the oven to 450° F (232° C).
- Toast 2 slices of Oat-Sorghum-Buckwheat-Banana-Flaxseed GF Bread to a golden brown.
- Place toast on top of a cooling rack sitting on top of a metal baking sheet.
- Spread a generous tablespoon of your favorite pizza sauce, canned or homemade, on each slice.
- Spread a layer of shredded mozzarella cheese on top of the sauce, about 1/3 cup (80 ml) per slice.
- Spread any other cheeses, such as diced or shredded sharp cheddar, on top of the mozzarella.
- Add your toppings and a touch more mozzarella.
- Slide the mini pizzas, cooling rack, and baking sheet together into the hot oven.
- Bake for 9 minutes until cheese melts and bubbles.
- Slide the baking sheet and rack out from the oven and transfer pizzas to a plate using a metal spatula.
- Serve.
About Gluten Free Toasters
Toasting gluten free bread in a typical kitchen 2 or 4-slice toaster cannot be completed in one toasting cycle. To achieve a golden brown toast requires 2 or even 3 toaster cycles. Typical toasters provide toasting times of no more than 2-1/2 minutes maximum per cycle. A few more expensive toasters can toast up to 3 minutes. It is common for GF breads to require a single cycle toasting time of more than 5 minutes to toast golden brown. It takes 5 minutes 15 seconds starting in a cold 1000 watt kitchen toaster to toast slices of Oat-Sorghum-Buckwheat-Banana-Flaxseed GF Bread to a golden brown in a single cycle.
A toaster-oven can provide a longer single cycle toasting time, but may require 10 minutes or longer to toast GF bread golden brown. A toaster-oven is less efficient for toasting bread than a 2 or 4-slice toaster because it must heat up a much larger volume than a 2 or 4-slice toaster which has heating elements up against the bread.
A few manufacturers have provided toasters with a "Gluten Free" button to extend the maximum single cycle toasting time. These include Crux 2 and 4-Slice Toasters [17] available exclusively at Macy's, Bella Pro Series and Ultimate Elite 2 and 4 Slice Toasters [18,19], and the Williams Sonoma Open Kitchen 2-Slice Stainless Steel Toaster [20]. There are several problems with these toasters. First, the maximum toasting times on the "Gluten Free" setting are still not long enough. Maximum toasting times provided by Bella for its Ultimate Elite Toaster are 3 minutes 50 seconds for the "Gluten Free" setting and 4 minutes 20 seconds for the "Gluten Free" + "Frozen" setting. Second, a gluten-free toaster for celiacs, by necessity, must be used exclusively for GF breads to avoid wheat contamination. A gluten free toaster does not need a "Gluten Free" button. A gluten free toaster simply requires a 6 minute maximum toasting time to adequately toast gluten free breads. One should not have to remember to push a "Gluten Free" button every time they toast bread. Is it so hard for manufacturers to offer a toaster with a 6 minute timer?
For those with some basic electronic technical skills, there is a relatively easy solution to having a toaster with a sufficiently long 6 minute maximum toasting time for GF bread. The electronic toaster controller board in a toaster can be modified to extend the maximum toasting time by simply replacing a resistor and/or a capacitor on the board. First one needs to find a toaster in which the controller board can easily be accessed. It turns out the Nesco T1000 toaster [21] is well-suited to the task. As toasters go, almost all are made in China and tend to have a high percentage of manufacturing defects per customer product reviews. The Nesco T1000 is a nice looking, sturdy toaster with nice features. With the right screwdriver to remove the "tamper proof" screws, the controller board is easy to get to and easy to modify. The only flaw in the Nesco T1000 is that the toasting time is shorter in a hot Nesco T1000 toaster than the toasting time in a cold Nesco T1000 toaster at the same browning setting, resulting in inconsistent browning. If toasting always begins in a cold toaster, browning is always consistent, and the browning setting need never be touched to achieve the same results every time.
Below, instructions on modifying the Nesco T1000 are provided. A modified Nesco T1000 toaster has been perfectly toasting GF bread daily for over 4 years without a single problem. These notes are of a technical nature. Modifying the Nesco T1000 toaster will void the warranty. Any modifications you perform are done so at your own risk. If you are not familiar with electronic components or a soldering iron, do not attempt the modification. Find a friend or someone with the technical skills if you wish to have a modified Nesco T1000 toaster.
Nesco T1000 Toaster Tech Notes - How to Increase the Toasting Cycle Time
Summary:
The browning control circuit of the Nesco T1000 toaster is designed around the AO201D toaster controller chip, an 8-pin DIP integrated circuit. Toaster cycle timing is achieved by adjusting the frequency of a timer oscillator on board the AO201D via an external RC circuit. The frequency is inversely proportional to RC. Increasing R (resistance) and/or C (capacitance) decreases frequency and increases the toasting cycle time. R in the Nesco toaster is a summation of a 250k potentiometer (variable resistor) in parallel with a 390k resistor (R6) in series with a 68k thermistor (NTC) in parallel with a 180k resistor (R5). C is a .033µf capacitor (C3). The Defrost button increases the toasting cycle time by switching in an additional .0047µf capacitor (C4) in parallel with C3. The thermistor decreases the resistance as the toaster ambient temperature rises and is supposed to help stabilize the oscillator frequency which is affected by heat. Ideally, temperature compensation provided by the thermistor and the AO201D should keep the oscillator frequency stable and browning shade the same from batch to batch as the toaster ambient temperature rises. Unfortunately, in the Nesco toaster, the oscillator frequency becomes unstable and increases as the toaster heats up, significantly reducing the toaster cycle time when the toaster is hot compared to the cycle time of a cold toaster. Hence, to maintain the same browning shade of a cold toaster, the browning control must be turned up higher when toasting in a hot toaster. The modifications below will increase the original factory maximum toasting cycle time of about 2.5 minutes to about 5.5 minutes when the toaster is cold. The Defrost button adds up to 30 seconds or so additional time. (Note: There is no datasheet available online for the AO201D chip. A datasheet in chinese is available for a similar MCU CMS12530 chip [22] with some diagrams and tables labelled in english. The Pericom PT8A2514A toaster controller chip [23] is also of interest with an english datasheet and a timer that can be adjusted from 30 sec to 10 min.)
Tools Required:
- TA23 triangle head screwdriver (Silverhill Tools ATKTR4 Triangle Head 5 Size Screwdriver Set)
- #1 Phillips head screwdriver
- Mini needle nose pliers
- Mini wire cutter
- 25 watt taper point soldering iron
- Desolder bulb, wick, or tool
- 60/40 Tin/Lead rosin core solder
Parts Required:
- .02µf 25v to 100v ceramic or polyester film capacitor
- 68k 1/4-watt resistor (blue-gray-orange)
Disassembly:
- Lay some newspaper or a towel on the work surface.
- Have a container handy to keep the small screws and parts from getting lost.
- Remove the crumb tray (which makes 2 tabs on the plastic base that slip under the shell lip more visible).
- Lay the toaster upside down on the work surface.
- Using the TA23 screwdriver, remove the tiny black screw from the bottom of the chrome pop-up lever knob.
- Insert a tool slightly larger than the TA23 screwdriver into the screw hole (the TA27 driver if you have it) and push the black plastic insert out of the chrome portion of the pop-up lever knob to free the knob from the metal lever.
- Slip the knob off the metal pop-up lever.
- Remove the 4 triangle head screws which attach the black plastic base to the metal shell.
- Separate and lift the metal shell off the plastic base noting the 2 tabs that were under the crumb tray and the 4 metal tabs at the ends of the toaster slots that insert into small slots on top of the inner metal cage.
- Disconnect the 4-wire cable small white nylon connector connected to the browning control circuit board attached to the toaster shell.
- Completely separate the base and inner cage from the outer metal shell and set aside the base.
- Using the #1 Phillips screwdriver, remove the 2 broad head screws securing the insulation board to the browning control circuit board attached to the outer metal shell.
- Remove the 4 Phillips screws securing the browning control circuit board.
- Turn the browning control to an extreme so that you can easily realign it on reassembly.
- Lift up and slip the browning control circuit board from out behind the browning control knob and push buttons (the knob and buttons remain in place and do not have to be removed).
Modifications:
- Desolder and remove the 390k resistor (orange-white-yellow) labelled R6 (no replacement needed).
- Desolder and remove the 180k resistor (brown-gray-yellow) labelled R5. Replace R5 with a 68k 1/4-watt resistor (blue-gray-orange).
- Locate capacitor C3 (.033µf) which is numbered 2A333J.
- Turn the circuit board over and on the back side solder a .02µf 25v to 100v ceramic or polyester film capacitor across the two C3 capacitor connections keeping the .02µf capacitor flat against the circuit board and trimming off excess leads.
Reassembly:
- Before reassembling, take a look at the pop-up lever spring mechanism and make sure the small metal plate beneath the lever properly aligns with the electromagnet arms when lowered. If skewed, twist the the metal plate until it is properly aligned (the plate in my toaster was skewed at the factory which caused a glitch preventing the pop-up lever from latching when first testing the toaster out of the box).
- Reverse the steps used in disassembly.
- Be sure to reconnect the 4-wire connecter, use the 2 broad head screws for the insulator board, and carefully align and insert the 4 outer metal shell tabs into the inner metal cage slots.
- Make sure you properly align the small notch in the black plastic insert with metal pop-up lever notch before pressing it back into the chrome portion of the pop-up knob.
- Do not over-tighten the triangle head screws, especially the tiny black screw in the pop-up knob (tighten just enough to bottom-out the screw heads).
Testing:
- Make sure all functions still work (you don't need bread in the toaster to test).
- Get a watch and time the toasting cycles at "1" and "6" settings both in hot and cold conditions (give the toaster plenty of time to cool to the touch for cold testing).
- At "1" you should get about 32 sec hot and 1 min 23 sec cold.
- At "6" you should get about 4 min 25 sec hot and 5 min 35 sec cold.
- Pressing the "Defrost" button will add additional time.
SOURCES
- Prime Grains Inc.
- Variation of Mucilage Content in the Flaxseed Coat; Diederichsen A, Raney JP, Duguid SD; Saskatchewan Flax Grower Oct 2003 Vol 5 No 1 https://saskflax.com/quadrant/media/Pdfs/Newsletters/flaxfall03.pdf
- Variation of mucilage in flax seed and its relationship with other seed characters; Diederichsen A, Raney JP, Duguid SD; Crop Science Feb 2005 Vol 46 No 1, p 365-371.
- Selection for increased seed mucilage content in yellow mustard; J Philip Raney and Gerhard FW Rakow; (Describes method used for determining mucilage content in seed); The Regional Institute, Online Publications.
- Farmer Direct Co-op
- USA Pan 13x4x4 Large Pullman Loaf Pan & Cover 1160PM-1 https://www.usapan.com/13-x-4-x-4-large-pullman-loaf-pan-and-cover-1160pm
- Chicago Metallic 44615 Pullman pan, single 13x4x4 https://www.bundybakingsolutions.com/
- Konjac Glucomannan Powder http://www.konjacfoods.com/product/1.htm
- The Gluten-Free-Bread Baking-with-Psyllium-Husks-Powder Test by Annalise Roberts http://mygluten-freetable.com/2014/04/the-gluten-free-bread-baking-with-psyllium-husks-powder-test/
- Fundamental Study on the Impact of Gluten-Free Starches on the Quality of Gluten-Free Model Breads; Horstmann SW, Belz MC, Heitmann M, Zannini E, Arendt EK; Foods. 2016 Apr 21;5(2) https://www.ncbi.nlm.nih.gov/pmc/articles/PMC5302342/pdf/foods-05-00030.pdf
- Strange Grains Gluten Free Bakery https://www.strangegrainsbakery.com.au/gluten-free-bread-perth
- Technological Properties of Pea and Buckwheat Flours and Their Blends; Ilze Beitane, Gita Krumina-Zemture, Martins Sabovics; Latvia University of Agriculture Research for Rural Development 2015, Annual 21st International Scientific Conference Proceedings Vol 1, p 137-42 http://llufb.llu.lv/conference/Research-for-Rural-Development/2015/LatviaResearchRuralDevel21st_volume1-137-142.pdf
- Northern Pulse Grower Association Pea Flour Brochure http://www.northernpulse.com/uploads\resources\661\pulse-flour-brochure.pdf
- USA Dry Pea & Lentil Council Brochures https://www.usapulses.org/
- Non-gluten proteins as structure forming agents in gluten free bread; Ziobro R, Juszczak L, Witczak M, Korus J; J Food Sci Technol. 2016 Jan;53(1):571-80 https://www.ncbi.nlm.nih.gov/pmc/articles/PMC4711467/pdf/13197_2015_Article_2043.pdf
- Ripple Foods Pea Milk https://www.ripplefoods.com/
- Crux Toasters http://www.cruxkitchen.com/crux_toaster_2slice.php
- Bella Pro-Series & Ultimate-Elite Toasters https://bellahousewares.com/
- Williams Sonoma Open Kitchen Toaster https://www.williams-sonoma.com/products/willaims-sonoma-open-kitchen-2-slice-stainless-steel-toaster/
- Nesco T1000 2-Slice Toaster http://www.nesco.com/products/Small-Appliances/Toasters/TWO-SLICE-TOASTER-THUNDER-GREY/
- MCU CMS12530 toaster controller chip (in chinese) http://mcu.com.cn/uploads/file/2015/20150819163253_26043.pdf
- Pericom PT8A2514A toaster controller chip https://www.diodes.com/assets/Datasheets/PT8A2514A.pdf


.webp.6e7bbbf8793807aefc1e09163e1cb79c.webp)


Recommended Comments
Create an account or sign in to comment
You need to be a member in order to leave a comment
Create an account
Sign up for a new account in our community. It's easy!
Register a new accountSign in
Already have an account? Sign in here.
Sign In Now